

This was originally written for a book that was not published by Andy Stanford-Clark. Permission has been given to reproduce it here.
Introduction
In this chapter we undertake a JavaScript programming project to show how a problem statement leads to a design, which leads to working code; and to show how a function node in Node-RED can be used to implement functionality that is not provided by an existing node.
Usually, writing a function node is the way to get your own chunks of program logic and algorithms into your node-RED application. Other times, it lets you do things that existing nodes can’t, for example, currently there is no function node to cut off a sub-string of the message. A two-line function node is the way to achieve this.
// return the first 10 characters of the message
msg.payload = msg.payload.substr(0,10);
return msg;
Sometimes you might use a function node to prototype a node that you might later turn into a new type of node for the Node-RED palette.
In this chapter we design and implement a function called the “Gearbox node”, which is very useful for processing streams of data, for example, messages coming in from an MQTT input node. I frequently use this node, and it is stored in my Node-RED library, ready to be added to any application with a couple of mouse clicks.
“Gearbox” node
It is often useful to be able to dynamically control the flow of data into parts of a Node-RED flow. For example you might have two sources of data coming in from two MQTT input nodes, and you want to be able to select one or the other at different times for subsequent processing. In general, being able to make use of data from one of a number of inputs which you can select.
It’s rather like selecting which gear your (manual gearbox!) car is in, letting one of a number of feeds through from the engine to the wheels. Or you could select “neutral” and the car doesn’t go anywhere: nothing is transmitted from the engine to the wheels, even though the engine is turning.
That’s what the gearbox node does. You can get the final version of the Node-
RED code here: https://flows.nodered.org/flow/37f68e4279304a7f864e2d9dd76fbba2
Don’t worry about what’s inside the function node at the moment, we’ll come to that later. For now, have a play with it to get a feel for what it does. In the next section of this chapter, we will explain how this node works, and develop the code for the node from scratch, starting from the requirements that we have for it.
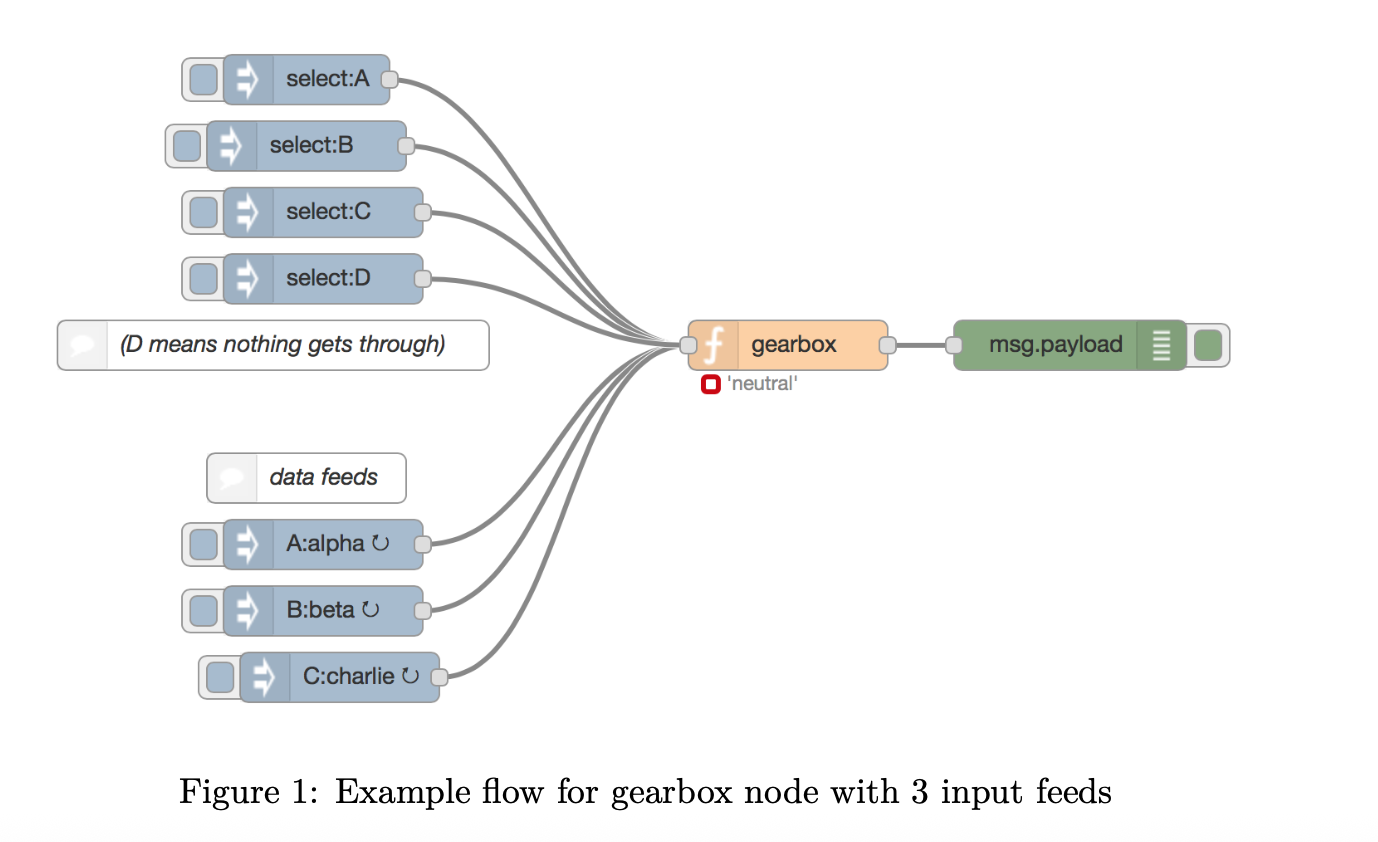
So that you can see what the node does, there is an example flow with three data feeds: A, B and C. The data feeds come in on distinct topics (in the example flow, ‘A’, ‘B’ and ‘C’), at a rate of one message per second.
To select one of the feeds, you send a message into the gear box node on the“select” topic with the payload set to the feed you want to select for transmission through the gearbox node. For example, to select data feed “A”, send in a message on topic “select” with payload “A”. After you’ve done that, any subsequent message on the “A” topic will be passed through the gearbox node to its output pin, and in the example flow will appear in the debug tab. If you select a topic that doesn’t match any of your feeds, none of the feeds passes through the gearbox. This is like putting your car into ‘neutral’. The node indicator, underneath the gearbox node, shows which feed is currently selected.
Requirements
We want to create a node that acts like a car gearbox, allowing the programmer to select one of a number of different data feeds and passing data from the selected feed through to its output.
When a message arrives on the selected data stream, it is immediately emitted from the output pin of the node.
The operation should be “dynamic”: you can select a different data feed at any time, and the node immediately switches over to the new input stream.
You should be able to select “neutral”, i.e. select none of the input streams, so nothing is emitted from the output pin. The node should start off in “neutral”, and you have to explicitly select one of the input streams before any data is emitted from the node.
Design
As nodes in Node-RED can only have one input pin, we need a way to distinguish two types of input message: * data feeds from various sources * the command to “change gear”.
Messages in Node-RED have a “topic” field associated with them, which is borrowed from the Internet of Things messaging protocol MQTT, where it is used to describe what a message is about, rather like the “subject” line of an email message. We will use the topic as the was we differentiate between the two message types.
As we are just passing through the selected input value whenever one arrives, we don’t need to store any of the input stream data inside the node. We do, however, need to remember what gear we’re in. That is, what is the currently selected input topic that we are transmitting through to the output?
This will be held as a local context variable within the node. The context variable should be initiatlised to “neutral” (no input stream selected) when the Node-RED application is deployed.
Implementation
As mentioned, we need to remember which topic is currently selected for output, and we store that locally in the gearbox function node using a context variable.
var selected = context.get('selected') || null;
The “|| null” bit means if we don’t currently have a selected topic for this gearbox node (because it hasn’t been set yet since the flow was deployed), then set it to null (or “nothing”, effectively).
Now we look to see if the message was a “gear selection” message, on the “select” topic.
if (msg.topic === "select") // change gear?
If it is, we want to store the selected gear, from the payload of the control message, in the function node context, so we can access it when subsequent messages come into the node.
{
selected = msg.payload;
context.set('selected', selected);
}
If the message wasn’t a gear selection message, it must have been a message from one of the input data streams.
else // data feed message
Now we look to see if this message has the same topic as the one we selected for transmission.
// transmit the message if it's on the currently selected topic
if (msg.topic === selected)
If it is, then we complete our processing of this message by passing it on to the output pin of the gearbox node, so Node-RED can send a copy of it on to whatever nodes are connected to the output pin.
{
return msg;
}
If the incoming message is on a different topic from the one currently selected for transmission (and, as we’ve already established, is not a ‘select’ message), then we simply drop out of the bottom of the function, which has the effect of doing nothing. i.e. nothing emerges from the output pin of the gearbox node as a result of this message coming into it.
Putting it all together
Here is the whole function, as described so far:
var selected = context.get('selected') || null;
if (msg.topic === "select") // change gear?
{
selected = msg.payload;
context.set('selected', selected);
}
else // data feed message
{
// transmit the message if it's on the currently selected topic
if (msg.topic === selected)
{
return msg;
}
}
// otherwise send nothing
If you want to try this for yourself, drag a function node from the Node-RED palette onto the canvas, double click it to open the code editor, and then copy and paste this code into it. Add some inject nodes for input, with different topics for the input messages and ‘select’ as the topic for the “gear changer” input. Add a debug node to the output pin and switch to the debug tab in Node-RED. Click the “Deploy” button to set your application running on the Node-RED server. The example flow here: https://flows.nodered.org/flow/37f68e4279304a7f864e2d9dd76fbba2 shows how to arrange input data and gear selection messsages.
Enhancements
After using the gearbox node in our applications for a while, a couple of improvements presented themselves. The first was to add an indicator to the gearbox node so you could see at a glance which input topic was currently selected. This was incredibly useful for debugging applications which used the gearbox node.
Topic indicator
The node.status function controls the presence of, and the icon and text of the node’s status indicator.
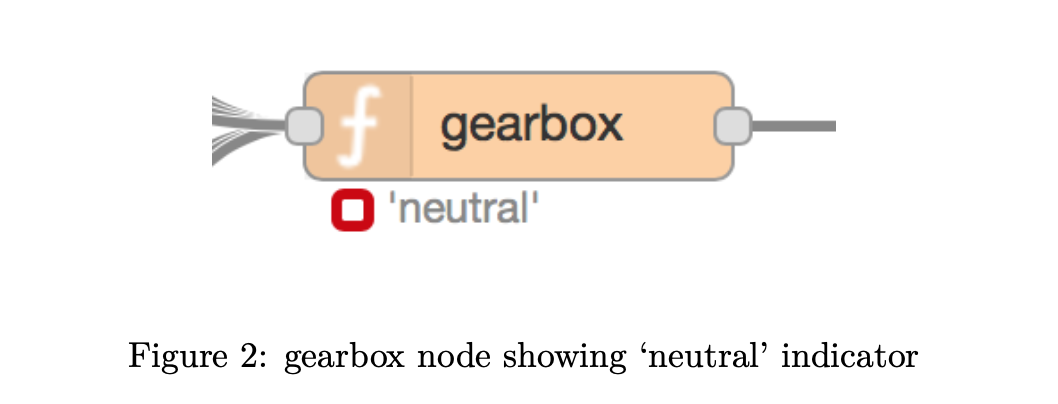
To make sure we display something sensible when a topic has not yet been selected, we add (near the top):
// initialse the node indicator to'neutral'
if (!selected)
{
node.status({fill:"red",shape:"ring",text:"'neutral'"});
}
This sets the status to a red ring and the text “neutral” if no ‘gear’ has yet been selected.
When we receive a control message (on the ‘select’) topic, and store it into the node’s context store, we also want to change the status indicator.
if (msg.topic === "select") // change gear?
{
selected = msg.payload;
context.set('selected', selected);
// the next line sets the node's status indicator
node.status({fill:"green",shape:"dot",text:selected});
}
This sets the status indicator to a green dot and the newly selected input topic is displayed.
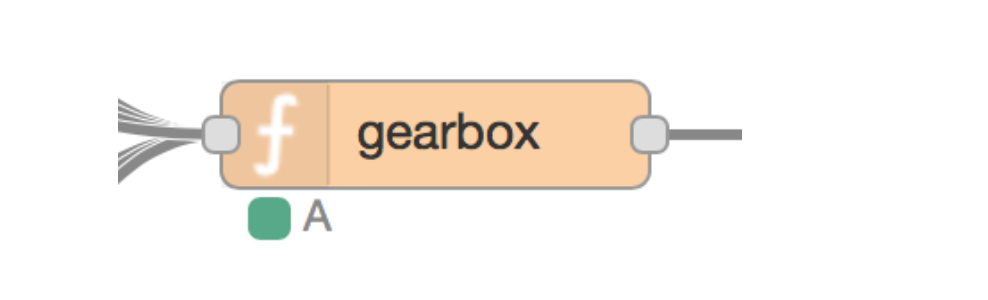
Figure 3: gearbox node showing topic ‘A’ currently selected for transmission
Retain feature
Another feature that was needed for some applications that used the gearbox node (but not others), is what we call a ‘retain’ feature. When the feature is activated, we want the gearbox node to temporarily store the most recent value received from each of the input topics, and then to release the stored message as the first message out of the gearbox node as soon as that feed topic is selected.
When this feature is not activated, when you send in a message on the select topic to set the input topic for transmission by the gearbox, nothing happens immediately at the output pin. Only when a message is subsequently published on the selected topic, does the message appear on the output pin.
This feature works rather like retained messages in MQTT that you may be familiar with, but note that it has nothing to do with the setting of the MQTT retain flag in any input messages.
Implementation
This feature is a bit complicated, compared with the simplicity of the function so far, so bear with me.
As we won’t always need this feature, we will make it switch selectable. In a node with a GUI (Graphical User Interface), we would have an on/off switch, but with code in a function node, we will use a boolean variable at the top of the function:
// do you want a "retained" message on each topic?
var retained = true;
Setting retained to true turns the feature on for this copy of the node, false turns it off.
We are going to store the latest message on each input topic in the context store for this node. We will use an array called ‘retains’, with the topic as the key, and the content of the message (payload) as the stored value. We need to make sure the retains[] data structure exists, so we don’t get errors later when we try to access elements of it. So, near the top of the function, we add:
// initialise the retains array if it doesn't exist
if (retained && !context.get('retains'))
{
context.set('retains', []);
}
This says, if we are using the retain feature, and the retains object does not yet exist in the context store, create it as an empty array. We will look next at how we store incoming messages temporarily in the context store. In the part of the code that deals with incoming data messages (i.e. not the gear select messages), if we are using the retain feature, we want to store the incoming message payload in the ‘retains’ array, keyed by the message topic.
// store message in the retain store
if (retained)
{
context.set("retains['"+msg.topic+"']", msg.payload);
}
See how we construct the syntax of an array reference to tell the context.set method where to store our data. For example, if the topic was ‘llama’, this line would store the payload of the message into the context store in the array element retains['llama'].
It is important to notice that in this section of the function we want to store the message into the retain store regardless of whether we transmit the message through to the output pin. That is, it is independent of which topic is currently selected. This is how we achieve this:
// store message in the retain store
if (retained)
{
context.set("retains['"+msg.topic+"']", msg.payload);
}
// transmit the message if it's on the currently selected topic
if (msg.topic === selected)
{
return msg;
}
Now we’re storing the payload data for each incoming topic, we can implement the logic that will immediately output the message we’ve stored for a newly selected topic when the control message comes in to select that topic.
if (msg.topic === "select")
{
selected = msg.payload;
context.set('selected', selected);
// the next line sets the node's status indicator
node.status({fill:"green",shape:"dot",text:selected});
// transmit an existing retained message on the new topic
if (retained)
{
var data = context.get("retains['"+selected+"']");
if (retained && data)
{
return {topic: selected, payload: data};
}
}
}
Again, we construct a string to denote the element of the ‘retain’ array we want to retrieve from the context store. In this case, the key is the newly selected topic from the payload of the select message, which is in the ‘selected’ variable. We retrieve the data from the context store into the ‘data’ variable. Bear in mind there might not be a stored message for this topic, if that data feed hasn’t published anything yet, and we only want to transmit the retained message if there is one.
In if (retained && data) we check we’re using the retain feature, and that there was a message on that topic in the retain store. If there is, we transmit the stored message payload on the selected topic to the output pin of the gearbox node:
return {topic: selected, payload: data};
Let’s put all that together. Here’s the complete function to implement the gearbox node.
// do you want a "retained" message on each topic?
var retained = true;
var selected = context.get('selected') || null;
// initialise the retains array if it doesn't exist
if (retained && !context.get('retains'))
{
context.set('retains', []);
}
// initialse the node indicator to'neutral'
if (!selected)
{
node.status({fill:"red",shape:"ring",text:"'neutral'"});
}
if (msg.topic === "select") // change gear?
{
selected = msg.payload;
context.set('selected', selected);
// the next line sets the node's status indicator
node.status({fill:"green",shape:"dot",text:selected});
// transmit an existing retained message on the new topic
if (retained)
{
var data = context.get("retains['"+selected+"']");
if (retained && data)
{
return {topic: selected, payload: data};
}
}
}
else // data feed message
{
// store message in the retain store
if (retained)
{
context.set("retains['"+msg.topic+"']", msg.payload);
}
// transmit the message if it's on the currently selected topic
if (msg.topic === selected)
{
return msg;
}
}
// otherwise send nothing
Wire the flow up with some inject nodes to provide input data and some gear changes on the ‘select’ topic, and have a play.
Summary
We have designed and built a Node-RED function node to implement a “gearbox” function, starting from a set of requirements. We added a couple of enhancements, which were found to be desirable additional features once we’d used the original design for a while.
The gearbox node has proved to be very useful for routing a flow of data from one of a number of possible input sources into the rest of the flow for further processing.